
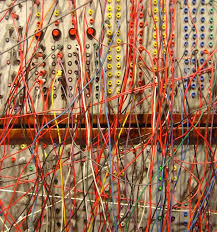
 One of the really cool aspects of modular synthesis is how the system looks when patched up: a colorful, higgeldy-piggeldy crazy network of patch cables, stretching hither and yon across the instrument in a nearly indecipherable tangle.
And while this looks really great, cementing your image as a wild-eyed techno-genius, it can be a little bit hard to follow. I have certainly noticed that in coming back to a patch that I created a day or more previously, I have to spend a bunch of time following the perplexing web of signal paths, to remind me of what goes where. So I present a couple of ideas that will not eliminate the problem, but might help keep down the clutter a bit.
Use black cables for permanently wired connections
 While I like to strip things down to a blank slate, there are always a number of connections that are (semi-) permanently connected in my system. My master clock, a Pamela’s Workout creates a series of pulses at various time divisions which feed, among other things, variable delays to create swing time, and a clock divider. At the other end of the line, my mixer’s master outs go to a mult, which then feed a headphone amp, an Intellijel audio output for connecting to the outside world, and my 1010 Music Bitbox, which I use for recording my patches and performances.
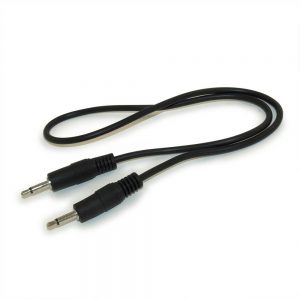
Each of those connections are done using black cables. Why? Because black fades into the background, allowing me to use my colored cables for the temporary connections. When I am ready to tear down a patch to make room for something new, I leave all the black cables in place. As an added benefit, they are also cheaper than colored cables, and readily available at electronics stores and websites like mycablemart.com.
Have a variety of cable lengths available
Having cables that will drape nicely without hanging down too far, will help keep the visual clutter down. I have cables in every length I can find, from 3 inches up to 3 feet. Having them color coded by length also makes it faster and easier to find the right size: my yellows are short, greens and blues are medium, and reds are long.
Smooth out the bends
I’ve purchased a lot of cables that come folded up into little bundles. That may make it easy to ship, but when you unwrap the cable, it has bends all throughout that keep it from draping nicely. I have found a technique that works to tame the bends, making the cable lie much straighter:
- Wrap the cable(s) around the top of the outside rim of a pot. Use paper clips to hold them in place. Make the wrap reasonably tight, so that it is strung fairly straight.
- Boil water in a kettle. Do not boil it in the pot the cables are tied around.
- When boiling, pour water into the pot up to the level of the cables.
- Leave the cables and pot until the water cools back down to room temperature. Voila! Straighter cables.
Use thick, cloth-wrapped patch cables
 Far and away, my favorite patch cables come from Modular Addict. They have cables that have a cloth mesh surface, that are thicker than your standard patch cables, and drape very nicely. They have them in a variety of colors and sizes, so you can organize length by color, as mentioned above.
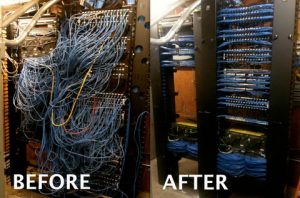
Use Velcro cable ties for big clusters of cables
If you are planning to use a patch for live performance, you can use Velcro cable ties, wrapped at strategic points, to cluster cables together. This can open up space for you to get your hand in and twiddle those knobs.
Hope these tips help turn your nest of cables into…a slightly less chaotic nest of cables.