The Building Blocks of Modular

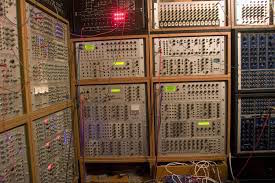
I walked into my favorite brick and mortar Eurorack storefront last week: Perfect Circuit Audio in Burbank, California. They are a truly marvelous shop, loaded to the brim with modular gear and electronic music accoutrements. But I was immediately struck by something: it seemed that nearly every module was quite wide, and festooned with loads of blinking lights and colorful displays. It feels like the ever-expanding market of Eurorack modules are getting larger, more complex, and more eye-catching.

I’m not a Luddite by any means, and am all for development and expansion of design. But I can’t help but feel that we are getting away from the basics that make creating modular synth music a unique experience. In my mind, the whole point of carefully selecting fundamental building blocks of synthesis like oscillators, filters, and envelope generators is to create a system that is uniquely your own, reflecting what your particular interest and aesthetic is. There are several benefits to buying smaller, simpler modules to build up your system:

  • You really learn the fundamentals of synthesis by exploring each element a function at a time
  • It is more affordable to purchase smaller, less expensive modules as you can pay for them, allowing you to relish the slow expansion of your instrument
  • You can create an instrument that really reflects what you want to do – which will slowly change over time the more you work with what you have.

To be clear, I love some of the amazing complex modules that are available today. I use Maths, Clouds, and Bitbox constantly, and they fulfill critical functions in my instrument. But the majority of my modules are more fundamental, and taking that approach has really allowed me to build something slowly that I really love and know well.

Unscrambling the spaghetti: Tips to make your patch cables a little easier to grok

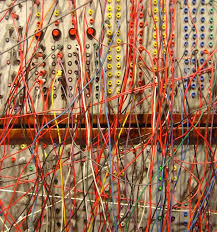
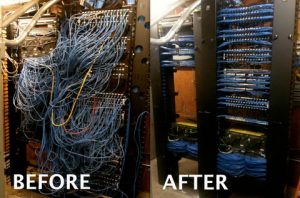
One of the really cool aspects of modular synthesis is how the system looks when patched up: a colorful, higgeldy-piggeldy crazy network of patch cables, stretching hither and yon across the instrument in a nearly indecipherable tangle.
And while this looks really great, cementing your image as a wild-eyed techno-genius, it can be a little bit hard to follow. I have certainly noticed that in coming back to a patch that I created a day or more previously, I have to spend a bunch of time following the perplexing web of signal paths, to remind me of what goes where. So I present a couple of ideas that will not eliminate the problem, but might help keep down the clutter a bit.

Use black cables for permanently wired connections

While I like to strip things down to a blank slate, there are always a number of connections that are (semi-) permanently connected in my system. My master clock, a Pamela’s Workout creates a series of pulses at various time divisions which feed, among other things, variable delays to create swing time, and a clock divider. At the other end of the line, my mixer’s master outs go to a mult, which then feed a headphone amp, an Intellijel audio output for connecting to the outside world, and my 1010 Music Bitbox, which I use for recording my patches and performances.
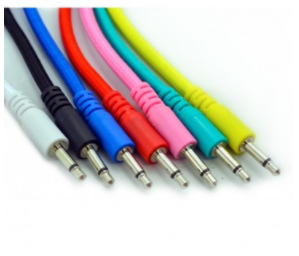
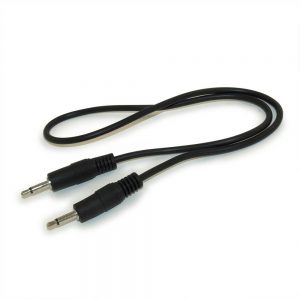
Each of those connections are done using black cables. Why? Because black fades into the background, allowing me to use my colored cables for the temporary connections. When I am ready to tear down a patch to make room for something new, I leave all the black cables in place. As an added benefit, they are also cheaper than colored cables, and readily available at electronics stores and websites like mycablemart.com.

Have a variety of cable lengths available

Having cables that will drape nicely without hanging down too far, will help keep the visual clutter down. I have cables in every length I can find, from 3 inches up to 3 feet. Having them color coded by length also makes it faster and easier to find the right size: my yellows are short, greens and blues are medium, and reds are long.

Smooth out the bends

I’ve purchased a lot of cables that come folded up into little bundles. That may make it easy to ship, but when you unwrap the cable, it has bends all throughout that keep it from draping nicely. I have found a technique that works to tame the bends, making the cable lie much straighter:

  1. Wrap the cable(s) around the top of the outside rim of a pot. Use paper clips to hold them in place. Make the wrap reasonably tight, so that it is strung fairly straight.
  2. Boil water in a kettle. Do not boil it in the pot the cables are tied around.
  3. When boiling, pour water into the pot up to the level of the cables.
  4. Leave the cables and pot until the water cools back down to room temperature. Voila! Straighter cables.

Use thick, cloth-wrapped patch cables

Far and away, my favorite patch cables come from Modular Addict. They have cables that have a cloth mesh surface, that are thicker than your standard patch cables, and drape very nicely. They have them in a variety of colors and sizes, so you can organize length by color, as mentioned above.
Use Velcro cable ties for big clusters of cables

If you are planning to use a patch for live performance, you can use Velcro cable ties, wrapped at strategic points, to cluster cables together. This can open up space for you to get your hand in and twiddle those knobs.

Hope these tips help turn your nest of cables into…a slightly less chaotic nest of cables.


The whirlwind of Eurorack modules: Use your ears

There are now literally thousands of Eurorack modules available to purchase, from dozens of companies, ranging from fairly substantial to one-person mom and pop shops. The quest to build the modular synth of your dreams is finicky, expensive, and never-ending. Anyone who has been doing this for a while has made mistakes, and purchased something that turned out to not be suitable for them. Mistakes can be financially costly, although many modules hold a significant portion of their value when sold as used.

So you have a few bucks stowed away, and you are ready to buy your next module. What do you get? How do you do it?

1. Identify the function you need most. It’s not just about getting the coolest thing you’ve heard of. What function is the next thing you need to expand the capabilities of all the modules you already have? A sound generator? A CV modulator? A mixer or audio I/O? Remember, a system filled with nothing but sexy modules with lots of blinky lights doesn’t have near the power or flexibility of a well-thought out system with all the utility stuff you need. Envelopes, mults, VCA’s, and LFO’s can be somewhat boring, but they are just as important to the overall system as a really cool wavetable oscillator.

2. Do research online. Muffwiggler and ModularGrid are excellent starting points for your research. ModularGrid has an amazing search feature, which allows you to specify function, manufacturer, width, and so on.

3. Listen online. There are loads of YouTube videos about nearly every module out there. Listen to what other people do with the module, and let that narrow your choices.

4. Most importantly, try it out in person whenever possible. This is such an individual thing, which is what makes it so powerful and expressive. Other people will have opinions that can help guide you, but the final step in the operation must be about your physically listening and playing with the item whenever possible. The final answer will be dictated by that approach, and may surprise you.

For example, I was looking for one more oscillator to finish up my system (for now). I searched on ModularGrid for something that would fit in the space I had, and narrowed it down. I then listened to examples and looked at functionality for my final choices, and settled on an E350 Morphing Terrarium. Cool module, lots of interesting capabilities by being able to index through wavetables, very highly rated by other people. So I pulled an oscillator that I had purchased at the beginning of my journey into Eurorack, but that didn’t do anything for me, to take for trade value. Went to my local shop (Perfect Circuit Audio in Burbank, CA) armed to buy the Morphing Terrarium. And then I sat and worked with the module for 15 minutes or so, listening intently, operating all the functions, plugging in CV modulation, and really concentrating on whether this unit would reflect my personality and electronic music goals.

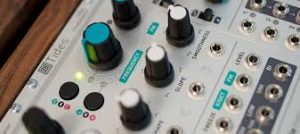
As it turned out, the unit in person didn’t grab me. It’s not that it was not an interesting oscillator – it absolutely was. It just wasn’t the right one for me. So after listening carefully to several others, I ended up purchasing a Mutable Instruments Tides. About half the cost of the Morphing Terrarium, but that wasn’t my driving interest in this case, as I had saved enough to buy the more expensive unit. There was just something about the way it indexed through waveshapes that immediately grabbed me. And the fact that there was alt firmware out there which gave it a couple of totally new functions sealed the deal. I walked away with a Tides, some money left in my pocket to spend on my kids this weekend, and a different perspective on what I was looking for.

NAMM 2017 day one

Here I am at the Anaheim convention center, for my yearly ritual of yammering to friends I see once a year, ogling the never-ending and bewildering array of new musical technology, and listening to some great music.

This year will be all about Eurorack – researching and discussing the latest modules with their inventors deciding what I do want (analog) and don’t want (digital – well perhaps except for the E350 Morphing Terrarium) and listening, listening, listening.

I received the modules yesterday to nearly finish my initial Eurorack performance environment. I know, you are never finished with modular. But sadly, the Doepfer A-155 sequencer did not arrive from Germany in one piece. I emailed the Doepfer company to see if I could perhaps leave it with them at NAMM to take it back for repair, and within an hour, Dieter Doepfer himself emailed back and told me who to talk to. Now that’s customer service!