Daniel Van Tijn, the founder of Intellijel, takes us through their new modules for 2018.
Nicolas Peck: Composer/Sound Designer/Audio Director/Electronic Musician

Daniel Van Tijn, the founder of Intellijel, takes us through their new modules for 2018.
Dave Rossum, the legendary synth designer behind E-Mu Systems, shows us the first Eurorack products that his new company, Rossum Electro-Music, are releasing.
We interview Dieter Doepfer, the inventor of Eurorack and founder of Doepfer Musikelektronik, on what new modules his company is announcing at NAMM 2018.
Today is the day! I’ve been quietly working for the last six weeks on getting the infrastructure ready for a YouTube channel. Text and audio are wonderful, but I’ve been interested in the notion that watching video captivates both your eyes and ears, creating an integrated experience that is more captivating, entertaining, and educational.
The primary focus of the channel will come as no surprise: I’ll be covering electronic music, modular synthesizers, musical composition and performance practice, DIY electronic instrument creation, and anything else music-oriented that interests me in the moment. However, I will also be covering my primary hobby: tabletop board games. I’ve been a huge fan of Dungeons and Dragons, role-playing games, Eurogames, and sci-fi games for decades. I’m a big supporter of the community and togetherness that analog board games bring to people, and will especially focus on enhancing the beauty of your games through DIY, and community surrounding the friendly local game stores (FLGS) and gaming conventions.
Finally, I’ll occasionally be posting thoughts that have nothing to do with either music or board games. This initial series of videos include one on my experiences with carpal tunnel syndrome, and another on the roots of creativity.
So to that end, I wanted to really hit the ground running, and so I waited until I had completed ten videos before putting anything up. Those initial videos are uploading today, to be followed by a weekly cadence of new videos on Sunday nights. I’ll be linking to each new video here on the site. And as soon as I have enough subscribers, YouTube will let me have a custom URL, which will be youtube.com/underthebigtree. If you like the idea of what I’m doing here, then please feel free to subscribe and help me reach that level.
I walked into my favorite brick and mortar Eurorack storefront last week: Perfect Circuit Audio in Burbank, California. They are a truly marvelous shop, loaded to the brim with modular gear and electronic music accoutrements. But I was immediately struck by something: it seemed that nearly every module was quite wide, and festooned with loads of blinking lights and colorful displays. It feels like the ever-expanding market of Eurorack modules are getting larger, more complex, and more eye-catching.

I’m not a Luddite by any means, and am all for development and expansion of design. But I can’t help but feel that we are getting away from the basics that make creating modular synth music a unique experience. In my mind, the whole point of carefully selecting fundamental building blocks of synthesis like oscillators, filters, and envelope generators is to create a system that is uniquely your own, reflecting what your particular interest and aesthetic is. There are several benefits to buying smaller, simpler modules to build up your system:
To be clear, I love some of the amazing complex modules that are available today. I use Maths, Clouds, and Bitbox constantly, and they fulfill critical functions in my instrument. But the majority of my modules are more fundamental, and taking that approach has really allowed me to build something slowly that I really love and know well.
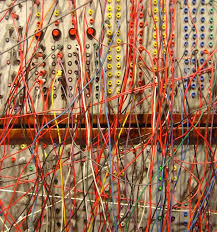 One of the really cool aspects of modular synthesis is how the system looks when patched up: a colorful, higgeldy-piggeldy crazy network of patch cables, stretching hither and yon across the instrument in a nearly indecipherable tangle.
And while this looks really great, cementing your image as a wild-eyed techno-genius, it can be a little bit hard to follow. I have certainly noticed that in coming back to a patch that I created a day or more previously, I have to spend a bunch of time following the perplexing web of signal paths, to remind me of what goes where. So I present a couple of ideas that will not eliminate the problem, but might help keep down the clutter a bit.
 While I like to strip things down to a blank slate, there are always a number of connections that are (semi-) permanently connected in my system. My master clock, a Pamela’s Workout creates a series of pulses at various time divisions which feed, among other things, variable delays to create swing time, and a clock divider. At the other end of the line, my mixer’s master outs go to a mult, which then feed a headphone amp, an Intellijel audio output for connecting to the outside world, and my 1010 Music Bitbox, which I use for recording my patches and performances.
Each of those connections are done using black cables. Why? Because black fades into the background, allowing me to use my colored cables for the temporary connections. When I am ready to tear down a patch to make room for something new, I leave all the black cables in place. As an added benefit, they are also cheaper than colored cables, and readily available at electronics stores and websites like mycablemart.com.
Having cables that will drape nicely without hanging down too far, will help keep the visual clutter down. I have cables in every length I can find, from 3 inches up to 3 feet. Having them color coded by length also makes it faster and easier to find the right size: my yellows are short, greens and blues are medium, and reds are long.
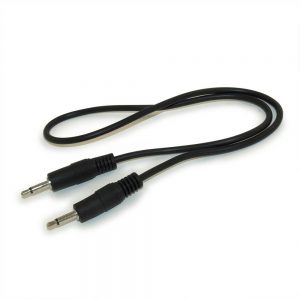
I’ve purchased a lot of cables that come folded up into little bundles. That may make it easy to ship, but when you unwrap the cable, it has bends all throughout that keep it from draping nicely. I have found a technique that works to tame the bends, making the cable lie much straighter:
 Far and away, my favorite patch cables come from Modular Addict. They have cables that have a cloth mesh surface, that are thicker than your standard patch cables, and drape very nicely. They have them in a variety of colors and sizes, so you can organize length by color, as mentioned above.
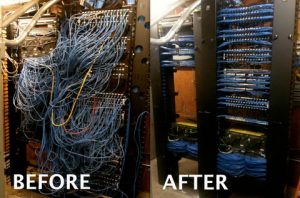
If you are planning to use a patch for live performance, you can use Velcro cable ties, wrapped at strategic points, to cluster cables together. This can open up space for you to get your hand in and twiddle those knobs.
Hope these tips help turn your nest of cables into…a slightly less chaotic nest of cables.